Okra
Clemson Spineless
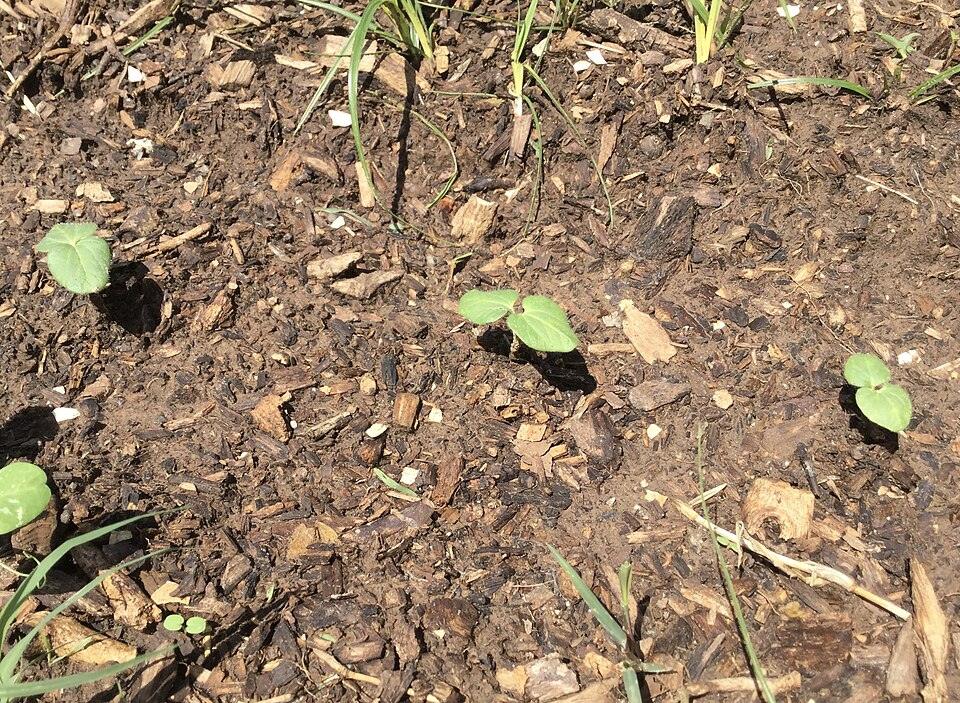 Young
YoungFreshly sprouted okra seedlings with cotyledon and first true leaves, in mulched garden soil
Generic Abelmoschus esculentus seedlings; not identified to the 'Clemson Spineless' cultivar.
Photo: Geo Lightspeed7· CC BY-SA 4.0
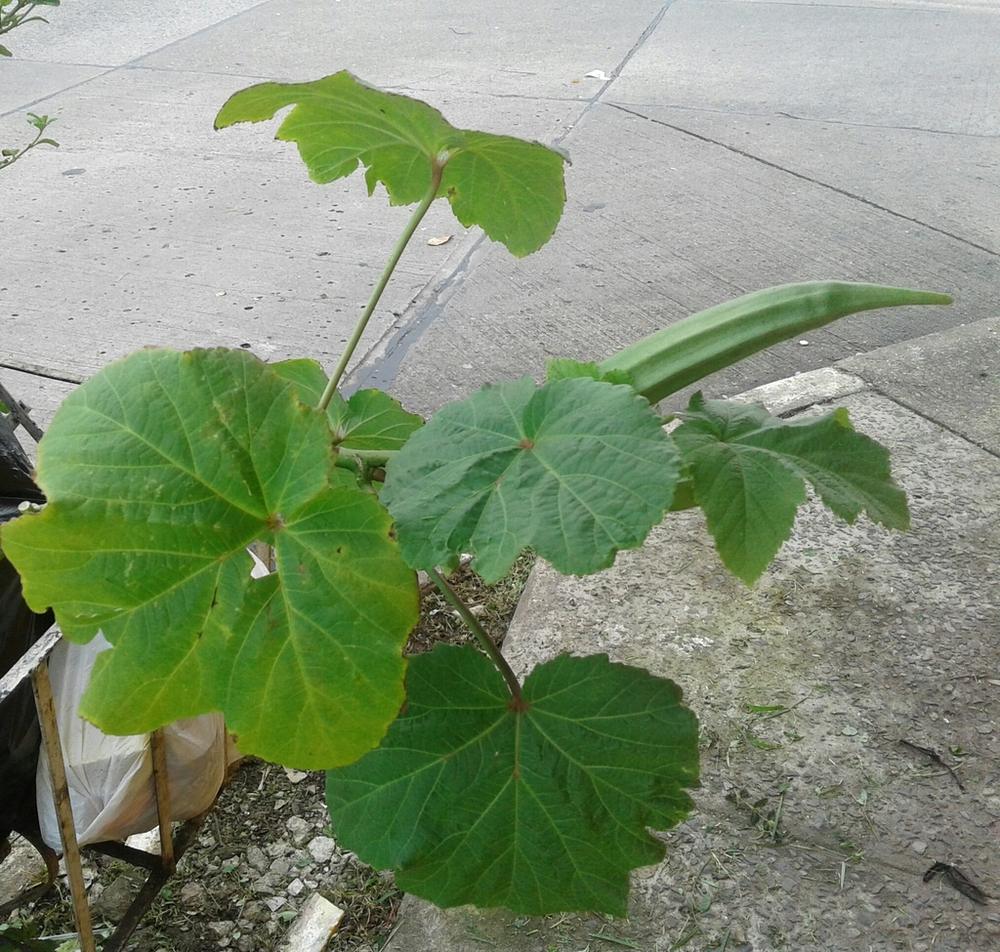 Growing
Young okra plant with broad palmate leaves and a single small pod forming, growing in a container
Generic okra plant; cultivar not identified.
Photo: Alex Espinosa· CC BY-NC
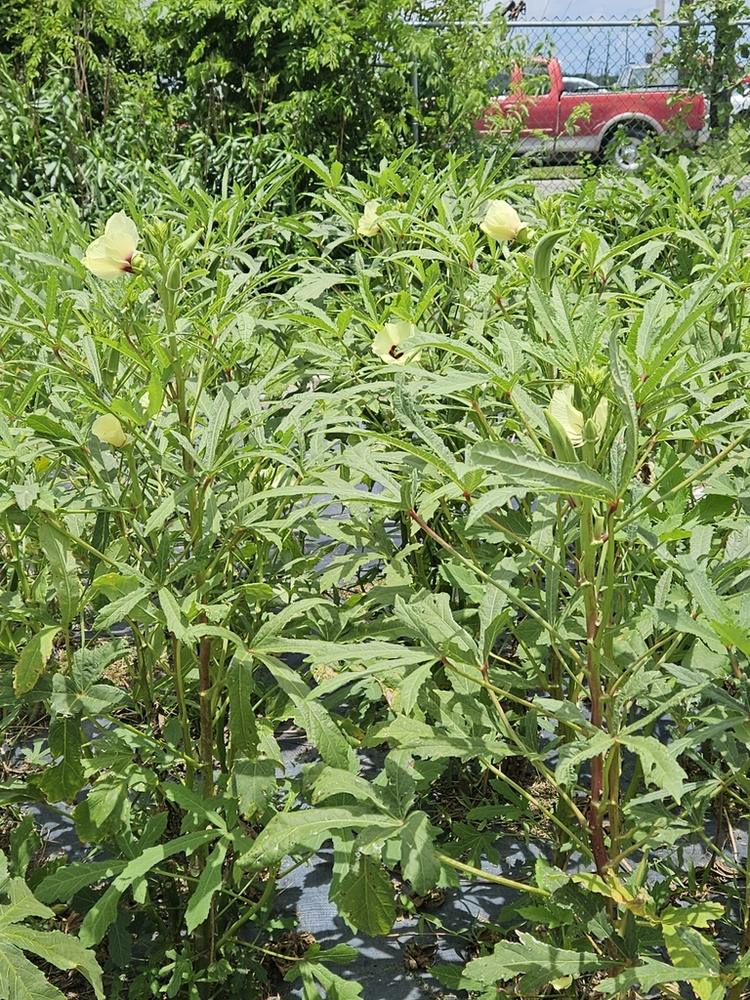 Full grown
Tall, full-grown okra plants in a field, with pale yellow flowers and pods
Generic field-grown okra with typical pale yellow hibiscus-like flowers; not confirmed as 'Clemson Spineless'.
Photo: Maria Hernandez· CC BY-NC
Growing stages
What to look for, and what to do, at each point in its lifeClemson Spineless okra goes into the ground as seed once soil is hot in mid-to-late spring, spends early summer building a deep taproot and a single tall stem, gets topped mid-season to force side branches and more pods, then demands near-daily harvesting through the hottest part of summer into early fall before frost around mid-November ends the plant.
- 1
Direct Sowing
Zone 8a: mid-April through June, once soil has warmed to at least 65-70F, usually 3-4 weeks after the last frost (~Mar 28).You'll see Nothing visible yet, or a bare bed with seeds pressed 1/2 to 1 inch into warm soil, spaced about 12-18 inches apart in the row.
Do Sow seed directly where it will grow. Okra develops a taproot almost immediately and resents disturbance, so skip transplanting if at all possible. Soak seed overnight to speed germination.
- 2
Seedling
Days 7-14 after sowing.You'll see A pair of rounded seed leaves (cotyledons) pushes up first, followed within a week by the first true, lobed okra leaves. Stems are thin and pale green, height a few inches.
Do Thin to one seedling per spot once true leaves show. Keep soil consistently moist (not soggy) until roots establish, and watch for cutworms or slugs, which can take out a whole seedling overnight.
- 3
Establishing Taproot
Weeks 2-5 after sowing.You'll see A single sturdy central stem with a handful of large, hand-shaped leaves; the plant looks modest above ground relative to what is happening below.
Do Water deeply but infrequently to encourage the taproot to grow down rather than staying shallow. Avoid heavy cultivation near the base that could sever root growth.
- 4
Vegetative Growth and Topping
Weeks 6-10 after sowing, main stem reaching 3-4 feet.You'll see A tall, upright single stem (unless topped) with large lobed leaves and the first flower buds beginning to appear where leaves meet the stem.
Do Once the main stem reaches about 3-4 feet tall, top it by cutting off the growing tip. This redirects energy into side branches, each of which will flower and set pods, substantially increasing total yield.
- 5
Flowering
Roughly 50-60 days after sowing, continuing all summer.You'll see Large, pale yellow, hibiscus-like flowers with a maroon or red throat, opening for about a day each, appearing along the main stem and any side branches from topping.
Do No action needed beyond consistent watering; okra flowers are perfect and mostly self-pollinating, so no hand-pollination is required for normal fruit set.
- 6
Pod Set and Harvest
Beginning about 55-65 days after sowing and continuing daily or every other day through summer into early fall.You'll see Ridged, tapering green pods emerging just behind spent flowers, growing quickly from tiny nubs to harvest size within days.
Do Harvest pods at 2-3 inches long, checking plants daily or every other day. Pods move from tender to tough and fibrous within a day or two past ideal size, so frequent picking is essential, not optional.
- 7
Seed Saving
Late summer into fall, choosing a few pods to leave on the plant from mid-to-late season onward, well before the first frost (~Nov 12).You'll see Selected pods left unpicked grow oversized, then the pod wall dries and turns from green to tan to brown and papery, eventually splitting slightly at the seams.
Do Choose a few healthy, typical pods on strong plants and let them mature and dry fully on the plant rather than harvesting them for eating. Once brown, dry, and starting to split, cut them off and finish drying indoors before shelling out the seeds.
- 8
End of Season
First hard frost, typically around Nov 12 in zone 8a.You'll see Leaves blacken and go limp within a day or two of a hard freeze; any remaining pods stop developing.
Do Harvest or leave for seed anything worth saving before the first hard frost, then pull spent plants and add healthy debris to the compost pile.
Techniques — transplant, prune, propagate, divide, seed
Full sun, heat-loving
Moderate; very drought-tolerant once established.
Direct sow 1" deep; grows 5–6 ft tall — place at north end so it doesn't shade beds.
Light feeder.
Care
- Direct sow ONLY — dislikes root disturbance.
- Soak seeds 12–24 hrs before sowing; soil must be ≥65°F.
- Never remove flowers.
Harvest
Pick pods young (2–4"); harvest every 1–2 days at peak or pods turn woody.
Watch for
Poor germination in cold soil — wait for warmth and soak seeds.