Peony
Peony
Do NOT divide until fall (Sep–Oct); 3–5 eye sections, plant no deeper than 1–2".
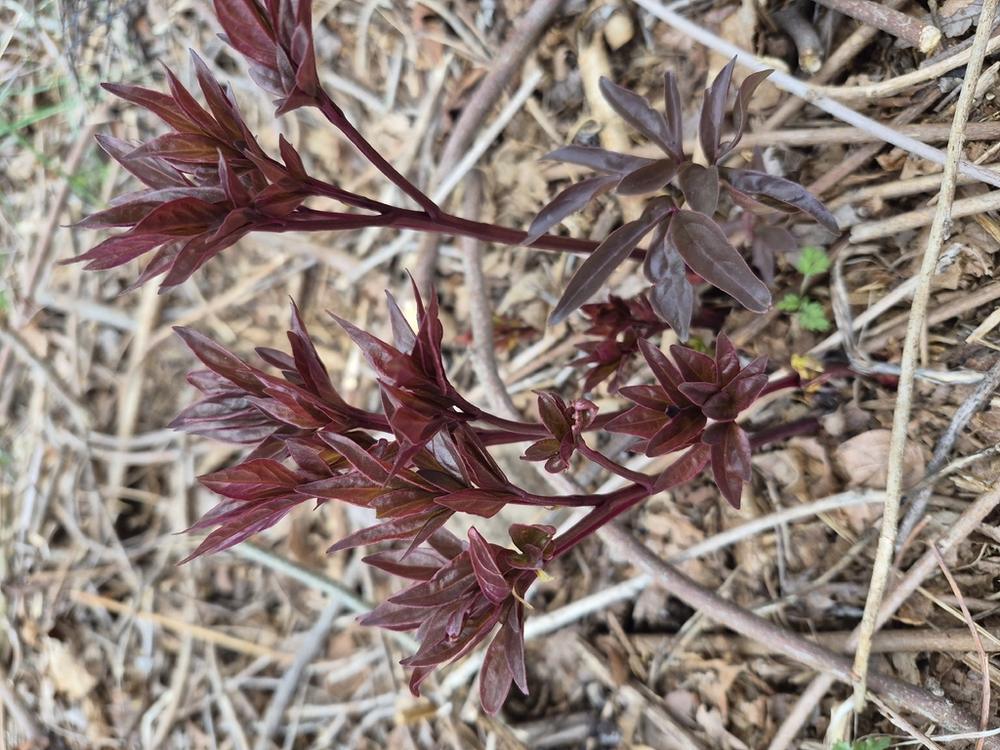 Young
YoungDeep burgundy-red peony shoots freshly emerging from the ground in mid-April, before any green leaf expansion.
Species-level Paeonia lactiflora (no specific cultivar specified for this planting).
Photo: Peter Koza· CC BY-NC
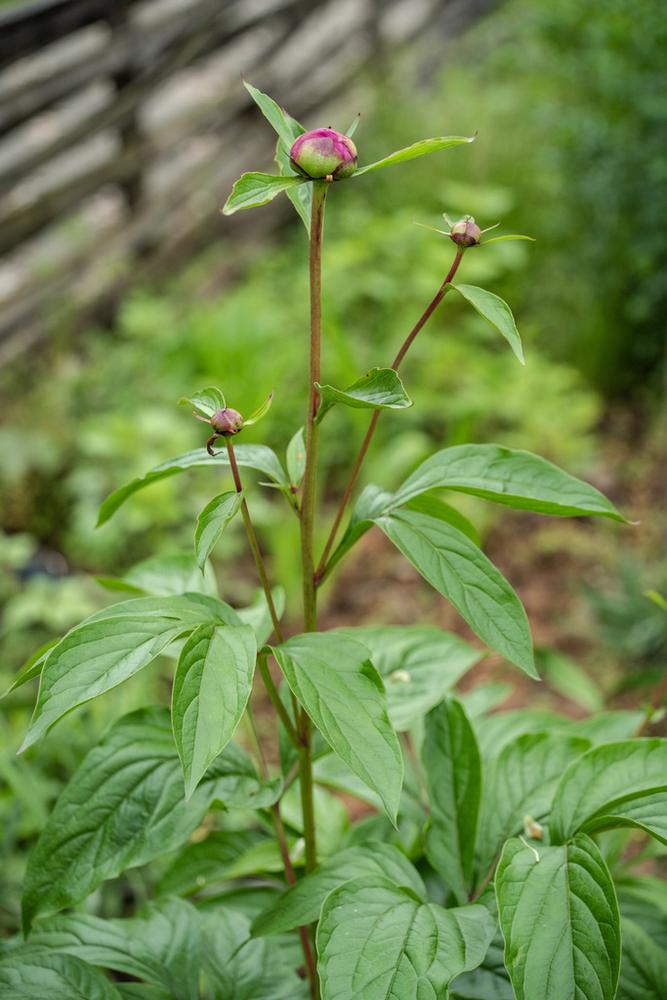 Growing
Leafy peony stem with fully expanded green foliage and several tight, unopened pink flower buds, just before bloom.
Species-level Paeonia lactiflora.
Photo: 政因· CC BY-NC
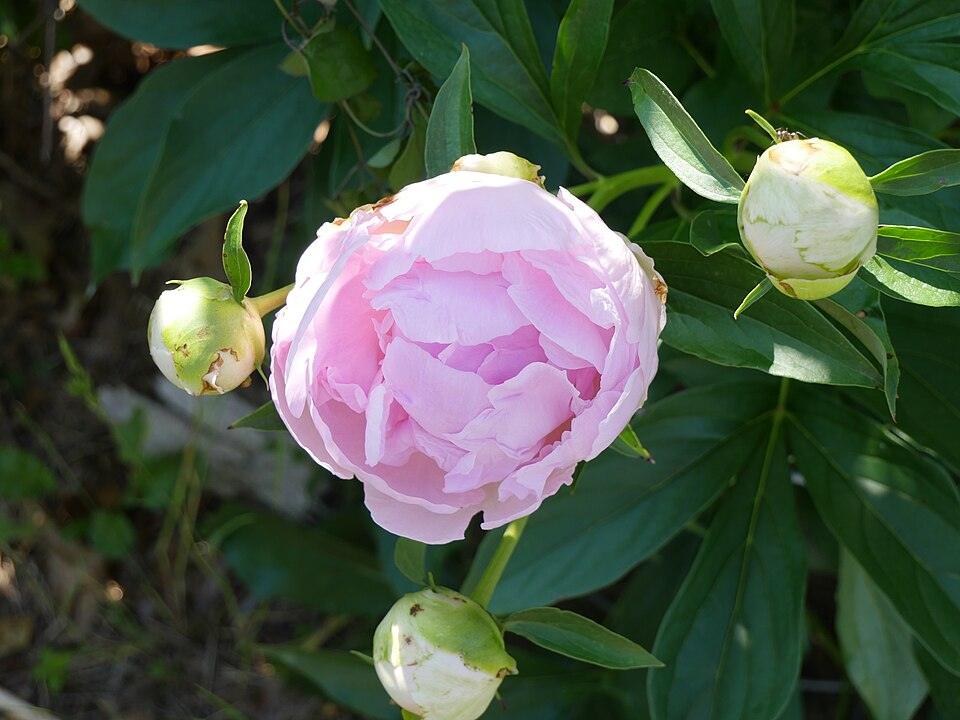 Full grown
Fully open double pink peony flower in bloom, surrounded by dark green foliage and additional unopened buds.
Species-level Paeonia lactiflora (double pink garden form); exact cultivar not identified.
Photo: F. D. Richards from Clinton, MI· CC BY-SA 2.0
Growing stages
What to look for, and what to do, at each point in its lifeIn Decatur's zone 8a, a peony spends most of the year as a quiet dormant crown, pushes up red shoots in late winter, and blooms once in a short window in April to early May, feeding next year's flowers with its foliage through summer before you cut it to the ground after fall frost; be aware zone 8a is at the edge of what herbaceous peonies need, so blooming may be lighter or less reliable than in colder climates.
- 1
Planting the crown
September through November (fall planting is best in zone 8a)You'll see You'll receive or dig a bare-root crown: a knobby brown tuberous root mass with pink-to-red pointed buds, called eyes, clustered at the top.
Do Plant with the eyes facing up and no more than 1 to 2 inches below the final soil surface, in full sun to light afternoon shade, in a spot with excellent drainage.
- 2
Winter dormancy
Late November through JanuaryYou'll see Nothing is visible above ground; the crown is a bare patch of soil that looks empty or is marked with a stake.
Do Leave it alone. Do not mulch thickly over the crown; a light layer of leaves is fine but pull it back in late winter.
- 3
Red shoots emerging
Late February into MarchYou'll see Thick, deep red to maroon pointed shoots push straight up out of the soil, looking almost like asparagus spears before any leaves unfurl.
Do This is the first visible sign the plant is waking up. Clear away any old mulch or leaf litter so shoots get light, and watch for a very late hard freeze, which can blacken tender new growth.
- 4
Buds forming, ants visiting
Late March into AprilYou'll see Stems reach 18 to 24 inches with full compound leaves, and round, marble-sized buds appear at the stem tips, often coated in a sticky, sugary film. Ants are commonly seen crawling all over the unopened buds.
Do Do nothing about the ants; they are harmless and normal. If you want fuller side blooms, some growers disbud the small side buds near a main bud, but this is optional.
- 5
Bloom
Mid to late April, sometimes into early MayYou'll see Large, often double, ruffled blooms open in white, pink, red, or coral depending on variety, frequently 5 to 8 inches across, heavy enough to bend or flop the stems, especially after rain.
Do Install stakes, a peony ring, or grow-through hoop supports before or right at bud stage so stems do not flop; cut a few stems for indoor vases if you like, taken when buds feel like a firm marshmallow (the marshmallow stage) and just starting to show color.
- 6
Post-bloom foliage
May through OctoberYou'll see After petals drop, the plant is a full, glossy, dark green mound of foliage about 2 to 3 feet tall and wide, with no more flowers.
Do Deadhead spent blooms just below the flower head, but leave all the foliage standing and photosynthesizing all summer. Water during dry spells and avoid overhead watering that keeps leaves wet.
- 7
Fall cutback
Late November after the first hard frost blackens the foliageYou'll see Frost turns the once-glossy leaves black, brown, and mushy or crisp; the plant collapses from an upright mound to limp, dead-looking stems.
Do Cut all foliage down to 1 to 2 inches above the soil line once frost has killed it back, and remove the cut debris from the bed entirely rather than composting it nearby.
- 8
Division
September, while the crown is dormant but the soil is still workableYou'll see You will be digging up a multi-year-old crown: a woody, knobby mass of tuberous roots with several clusters of eyes visible at the top once soil is washed or brushed off.
Do Dig the entire clump, rinse soil from the roots, and divide it with a clean, sharp knife into sections that each keep 3 to 5 eyes and a healthy piece of root, then replant immediately at the correct shallow depth.
Techniques — transplant, prune, propagate, divide, seed
Varies by species (see notes)
Varies — match to species (moisture-lovers vs. dry).
Right plant, right place.
Most ornamentals/wildflowers want LEAN soil — do not over-fertilize.
Care
- Divide most clumping perennials in fall (Sept–Oct).
- See the plant's own note for species-specific timing and cautions.
Harvest
Grown for bloom/pollinators, not harvest.
Watch for
Some spread aggressively (e.g. Liriope spicata via stolons) — mind placement.