Tomato (Brandywine)
Brandywine
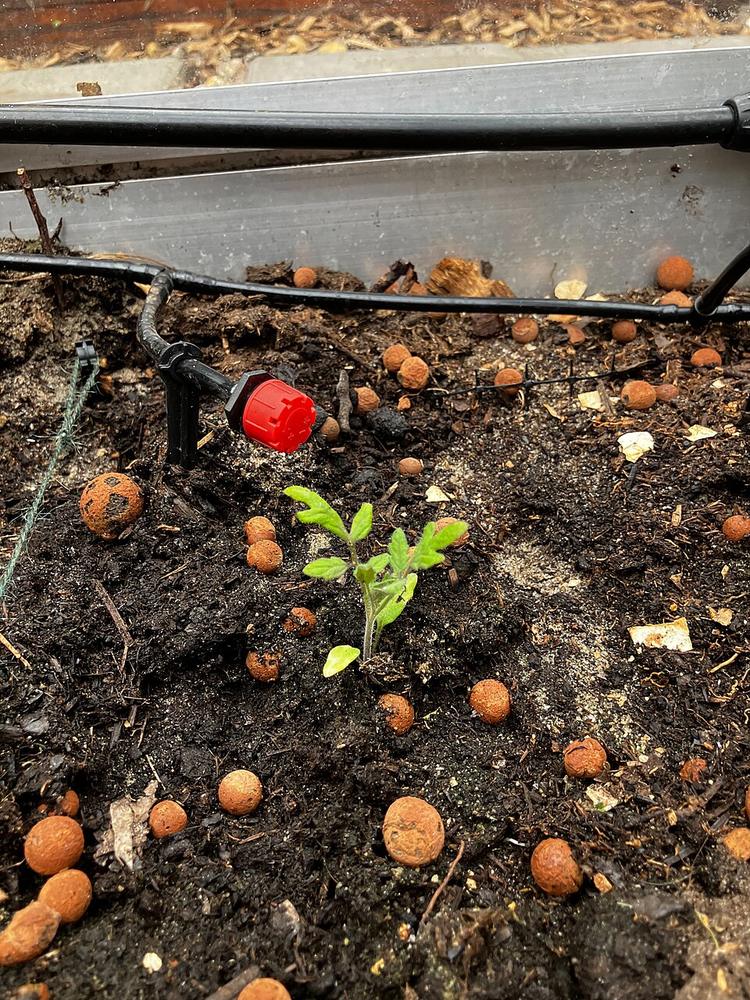 Young
YoungFreshly transplanted tomato seedling with first true leaves in garden soil
Generic tomato seedling
Photo: Mbehrisch· CC BY-SA 4.0
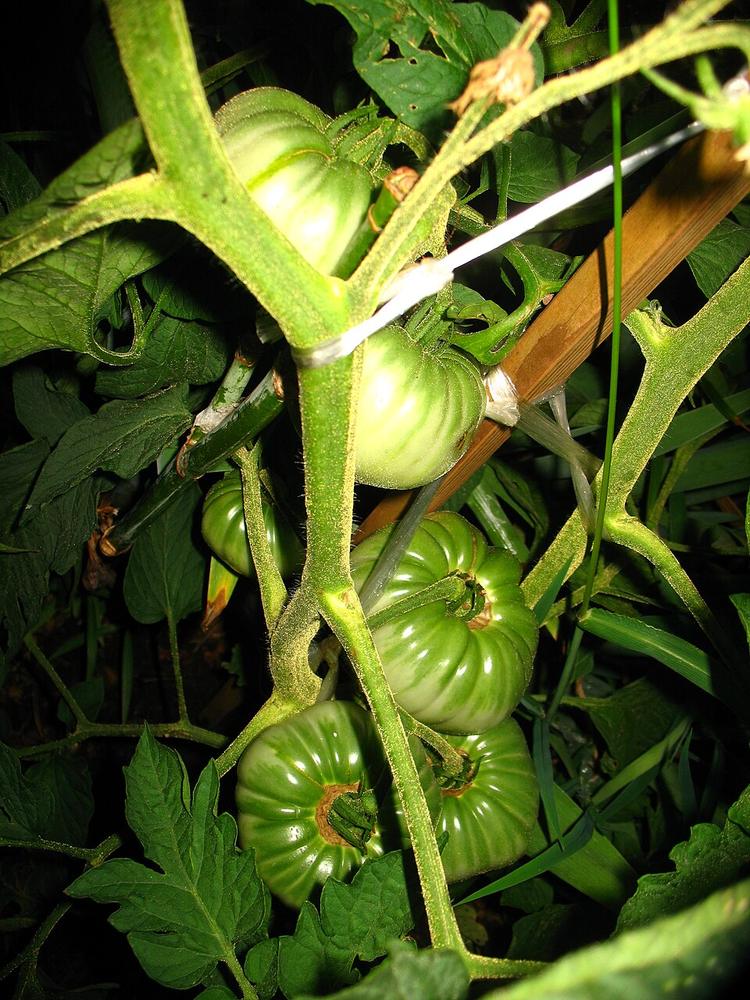 Growing
Brandywine tomato plant staked in the garden, bearing a cluster of large green ribbed fruit before ripening
Photo: Sridharlibrary· Public domain
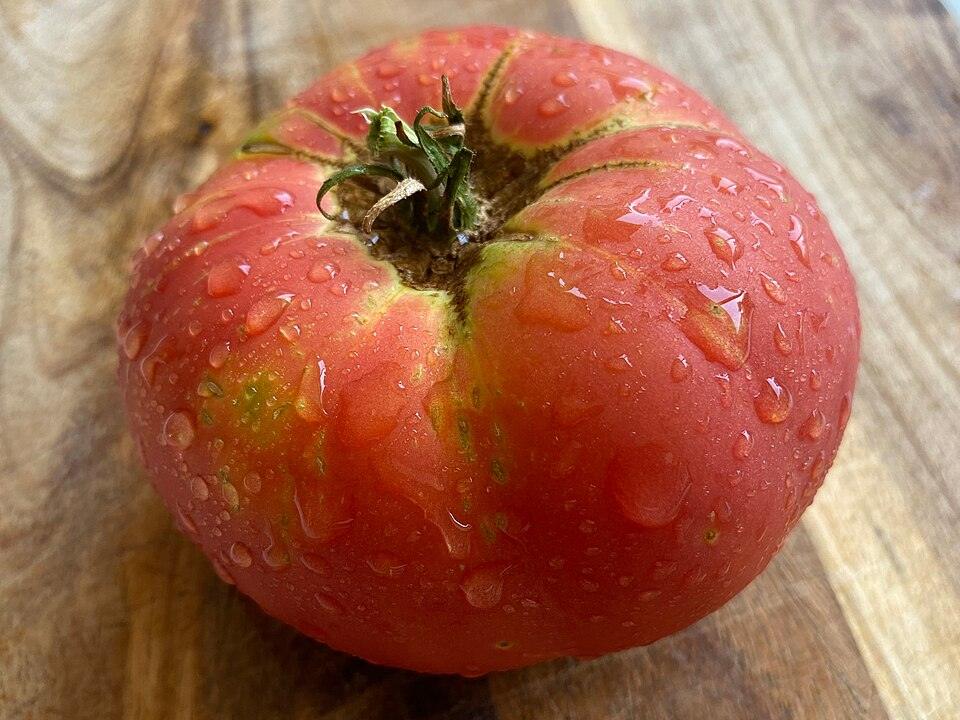 Full grown
Freshly picked ripe Brandywine tomato showing its classic pink-red color and ribbed heirloom beefsteak shoulders
Photo: David.moreno72· CC BY-SA 4.0
Growing stages
What to look for, and what to do, at each point in its lifeBrandywine is a potato-leaf, open-pollinated heirloom indeterminate slicer that goes in after the Mar 28 last frost, climbs and branches all summer with light sucker management, and over a long 80-100 day season delivers huge 1-1.5 lb pink-red beefsteak fruit with legendary flavor right up until the Nov 12 first frost cuts it down.
- 1
Sowing Seed Indoors
Late Jan to mid-Feb, about 6-8 weeks before the Mar 28 last frostYou'll see Seeds are flat, tan-yellow ovals. Within 5-10 days at 70-80F you will see a pale hook-shaped stem push up, followed by two smooth oval seed leaves (cotyledons). The true leaves that follow are smooth-edged and potato-like rather than the deeply serrated leaf of most tomatoes.
Do Sow 1/4 inch deep in seed-starting mix under grow lights kept 2-3 inches above the tray, with gentle bottom heat if the room is cool.
- 2
Seedling and Hardening Off
Weeks 2-8 after sowing, roughly mid-Feb through late MarYou'll see By 4-6 weeks the plant has several sets of true potato-type leaves and a sturdy central stem about pencil width. Leggy, pale, stretched seedlings signal too little light.
Do Pot up to a larger container once roots fill the starter cell, and begin hardening off outdoors 7-10 days before transplant.
- 3
Deep Transplanting Into the Bed
After Mar 28 last frost, once soil has warmed and nights stay above 50FYou'll see A healthy transplant ready for the ground is 8-12 inches tall with thick stems and 4-6 true potato-type leaves; the lower leaves may look slightly yellow if the plant has been in its pot too long, which is fine since they will be buried anyway.
Do Strip off the lower leaves and bury two-thirds of the stem, either straight down in a deep hole or sideways in a shallow trench, so only the top rosette of leaves shows above soil.
- 4
Vegetative Growth and Sucker Pruning
Weeks 3-8 after transplant, roughly mid-Apr through late May, and continuing all seasonYou'll see The plant sends up new shoots (suckers) from the crotch where each leaf branch meets the main stem. Left alone, every sucker becomes its own leader with its own leaves and flower trusses, quickly turning this large heirloom into a dense, sprawling tangle.
Do Pinch out suckers weekly with your fingers while they are small (under 2-3 inches), keeping the plant trained to 1 or 2 main leaders tied to the stake or cage.
- 5
Flowering and Hand Pollination
Weeks 6-10 after transplant, roughly late May through June, then continuing in flushes all summerYou'll see Small yellow star-shaped flowers form in clusters (trusses) along the stem. Brandywine sets fewer flowers per truss than many varieties, consistent with its lower overall yield.
Do On calm days with little wind or bee activity, gently vibrate each flower truss by hand or with an electric toothbrush for a few seconds to release pollen onto the stigma.
- 6
Fruit Set Through Harvest
Roughly 80-100 days from transplant to first ripe fruit, one of the longer seasons of any slicer, then continuing to first frostYou'll see Green fruit swells slowly into enormous, lumpy, ribbed globes, often reaching 1-1.5 lb, then ripens to a distinctive dusky pink-red with thin, delicate skin.
Do Harvest at full color and full give when gently squeezed, and keep tying the growing leader to its support as new heavy fruit sets continue up the plant.
- 7
Seed Saving by Wet Fermentation
Peak season, when the best-looking fruit from your strongest plant is fully ripe, roughly Aug through SeptYou'll see A fully ripe, unblemished, uncracked Brandywine fruit is the right pick; the seeds inside sit in a gel sac that must be broken down before drying.
Do Scoop seeds and gel into a labeled jar with a little water, let it ferment a few days until a mold film forms, then rinse and dry the sunk seeds thoroughly before storing.
Techniques — transplant, prune, propagate, divide, seed
Full sun (6–8+ hrs)
1–2" per week in deep soaks (drip). Irregular watering causes blossom-end rot and…
24–36" apart, staked or trellised
10-10-10 at planting → switch to 5-10-10 (or tomato-specific) at flowering, every 2–3…
Care
- Prune suckers on indeterminate slicers/heirlooms; remove lower leaves touching the ground.
- Calcium at planting (crushed eggshells or gypsum) prevents blossom-end rot.
- 1 tbsp Epsom salt per plant at transplant; repeat at first fruit set (magnesium for chlorophyll + fruit dev).
Harvest
Pick at full color for best flavor. Heirloom surplus freezes well for later jam/Bloody Mary batches.
Watch for
Blossom-end rot (calcium/water), cracking (irregular water), early blight (airflow, water at soil level, copper spray).