Garlic (Inchelium Red) New · Sep 2026
Inchelium Red softneck — ordered Sept 12 (SESE #65102); 4–5 full heads
Ordered from Southern Exposure Sept 12, and what arrived is 4-5 full heads. Inchelium Red runs about 5-6 heads and 45-75 cloves per pound at 8-15 cloves a head, so figure ~45-60 cloves, of which the biggest 30-45 are worth planting for bulbs. That roughly fills the Bed C south block (~32 at the 6" grid) with a modest remainder for bag 1 green garlic — not the surplus the earlier note claimed (~16 heads / 200+ cloves per pound, which was wrong). Year one is the tight year: next June's harvest becomes all future seed stock.
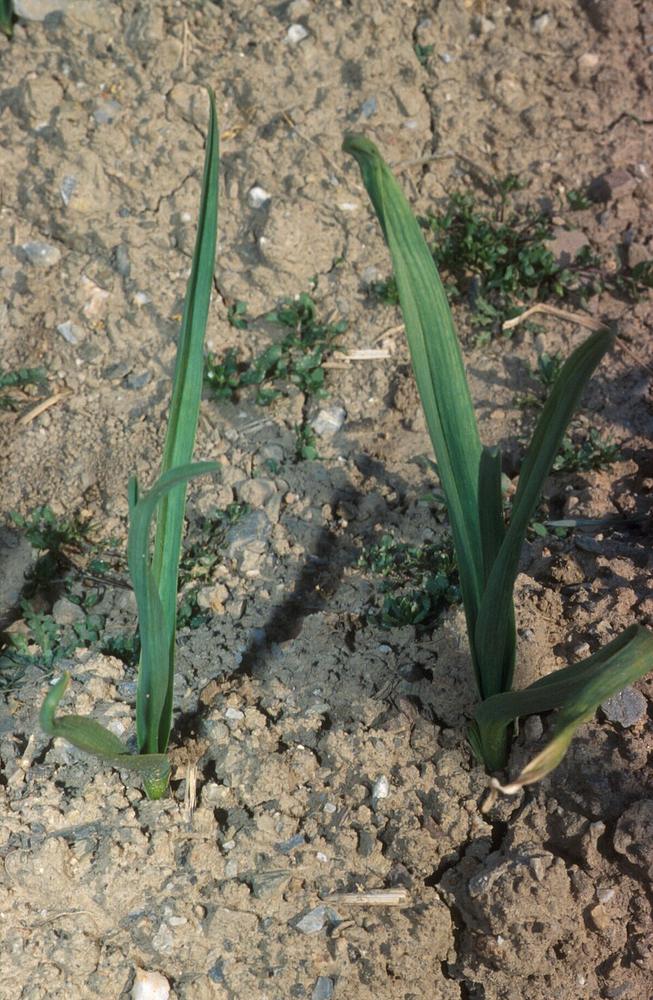 Young
YoungTwo young garlic shoots just emerged through soil in early spring (photo captioned 'aglio aprile' / garlic in April).
Generic Allium sativum shoots; softneck vs hardneck not identifiable at this stage.
Photo: Perito Francesco· CC BY-SA 3.0
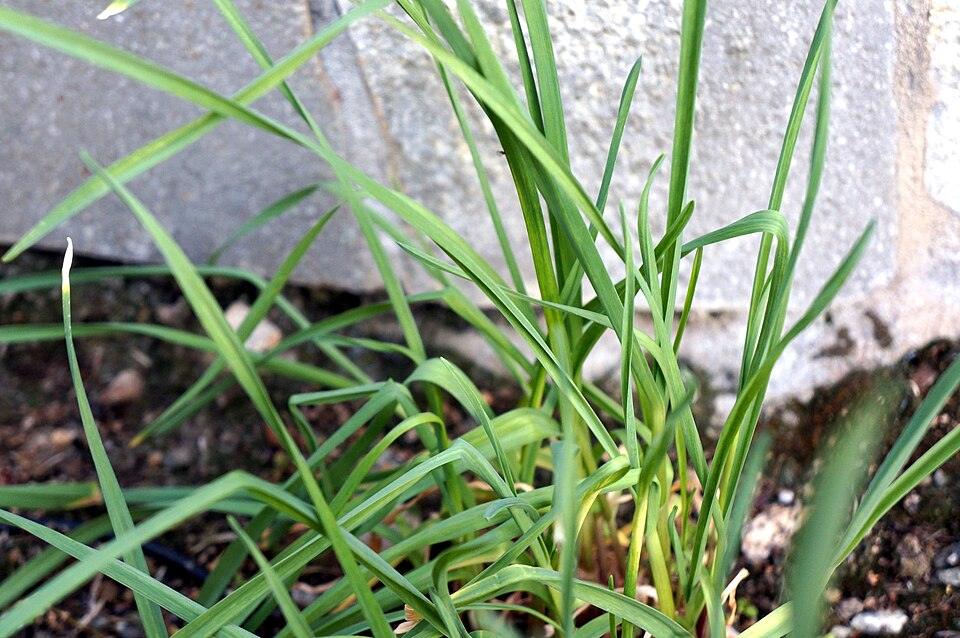 Growing
Leafy young garlic plant clump with multiple upright flat green leaves, still fully green.
Generic Allium sativum; softneck vs hardneck not distinguishable from foliage alone.
Photo: FASTILY· CC BY-SA 3.0
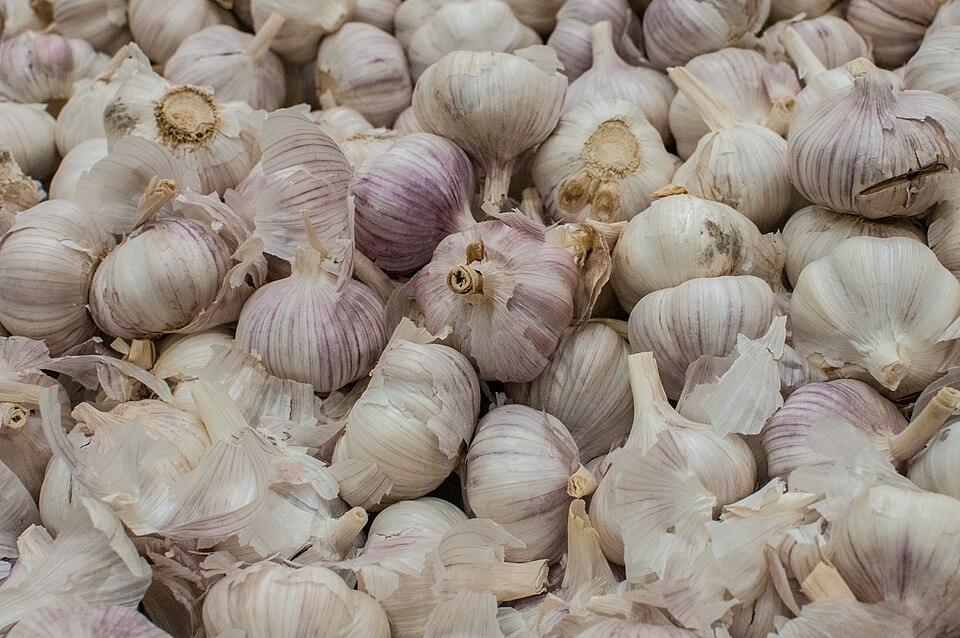 Full grown
Pile of cured garlic heads with dry papery wrappers, ready for storage.
Generic cured Allium sativum bulbs, some purple-streaked varieties mixed in; not confirmed softneck-only.
Photo: Wilfredor· CC0
Growing stages
What to look for, and what to do, at each point in its lifeInchelium Red softneck garlic goes into the ground as individual cloves in October or November, sits quietly through winter sending up thin green shoots, surges with growth in spring, then dies back to a papery-wrapped bulb by early summer that you cure and either eat or replant that fall to start the cycle again.
- 1
Clove Planting
Late October to mid-November, Zone 8aYou'll see You are handling loose, plump cloves you have just broken apart from a whole head, each still wearing its own papery skin, pointed on one end and flat where it attached to the basal plate on the other.
Do Push each clove pointy-end up, 2 inches deep, into loosened bed soil, spacing cloves 4 to 6 inches apart, then cover with 2 to 3 inches of straw or leaf mulch.
- 2
Winter Shoots
December through February, Zone 8aYou'll see Thin, grass-like green shoots poke up through the mulch, sometimes pausing or even yellowing slightly during the coldest snaps, then greening back up as temperatures moderate.
Do Leave the mulch in place, and don't fertilize yet; just make sure beds aren't sitting in standing water after heavy winter rain.
- 3
Spring Vegetative Growth
March into April, Zone 8aYou'll see Growth takes off fast now: leaves widen, turn a deeper green, and the plant can put out a new leaf every few days, reaching 12 to 18 inches tall with 6 or more leaves per plant.
Do Feed with a nitrogen source every 3 to 4 weeks while leaves are actively growing, and keep soil evenly moist.
- 4
Bulbing
Late April into May, Zone 8aYou'll see The base of each plant visibly thickens as individual cloves form and swell underground; leaves are still green but growth slows compared to the spring surge.
Do Cut off feeding entirely now, and ease back on watering slightly to encourage the bulb to firm up rather than stay soft and watery.
- 5
Harvest Cue: Leaf Die-Back
Late May into June, Zone 8aYou'll see The lowest, oldest leaves brown and die back first, working upward; by harvest time roughly 40 to 50 percent of the leaves on a plant should be brown while the upper leaves are still green.
Do Watch leaf color closely from late May on and stop watering about a week before you plan to harvest.
- 6
Harvest
Typically late May to mid-June, Zone 8aYou'll see You'll see the bulb sitting just at or slightly below the soil surface, wrapped in dry-ish outer skins, with roots still anchoring it below.
Do Loosen the soil around each bulb with a garden fork before lifting; never grab the top and pull, which can snap the stem or bruise the bulb.
- 7
Curing
2 to 4 weeks after harvestYou'll see Over the curing period the outer skins go from slightly moist and dull to dry, papery, and rustling, and the stem where the leaves attach shrinks and tightens down.
Do Hang bundles of 4 to 6 plants by the stems, or lay bulbs in a single layer on a screen or rack, somewhere shady, dry, and well-ventilated with good airflow.
Techniques — transplant, prune, propagate, divide, seed
Full sun
Even moisture; ease off before harvest.
Bags/cells; 24" round felt bags for the allium station. Bulb onions get their own ground…
Feed early; STOP feeding garlic/onions 3–4 weeks before harvest.
Care
- Cut garlic/onion scapes immediately to redirect energy to bulbs.
- Fall planting: order seed garlic July–Aug; onion transplants order mid-Oct for a mid-Nov ship (Dixondale). Garlic goes in in October, onion transplants in November.
- Buy onion transplants rather than starting from seed — onion seed is viable only 1–2 years and wants 8–10 weeks in flats.
Harvest
Onions when tops flop; garlic when lower leaves brown. Granex/sweet onions that bolt early can be harvested as spring onions.
Watch for
Early bolting in warm spring — harvest as spring onions if it happens.